How It Works
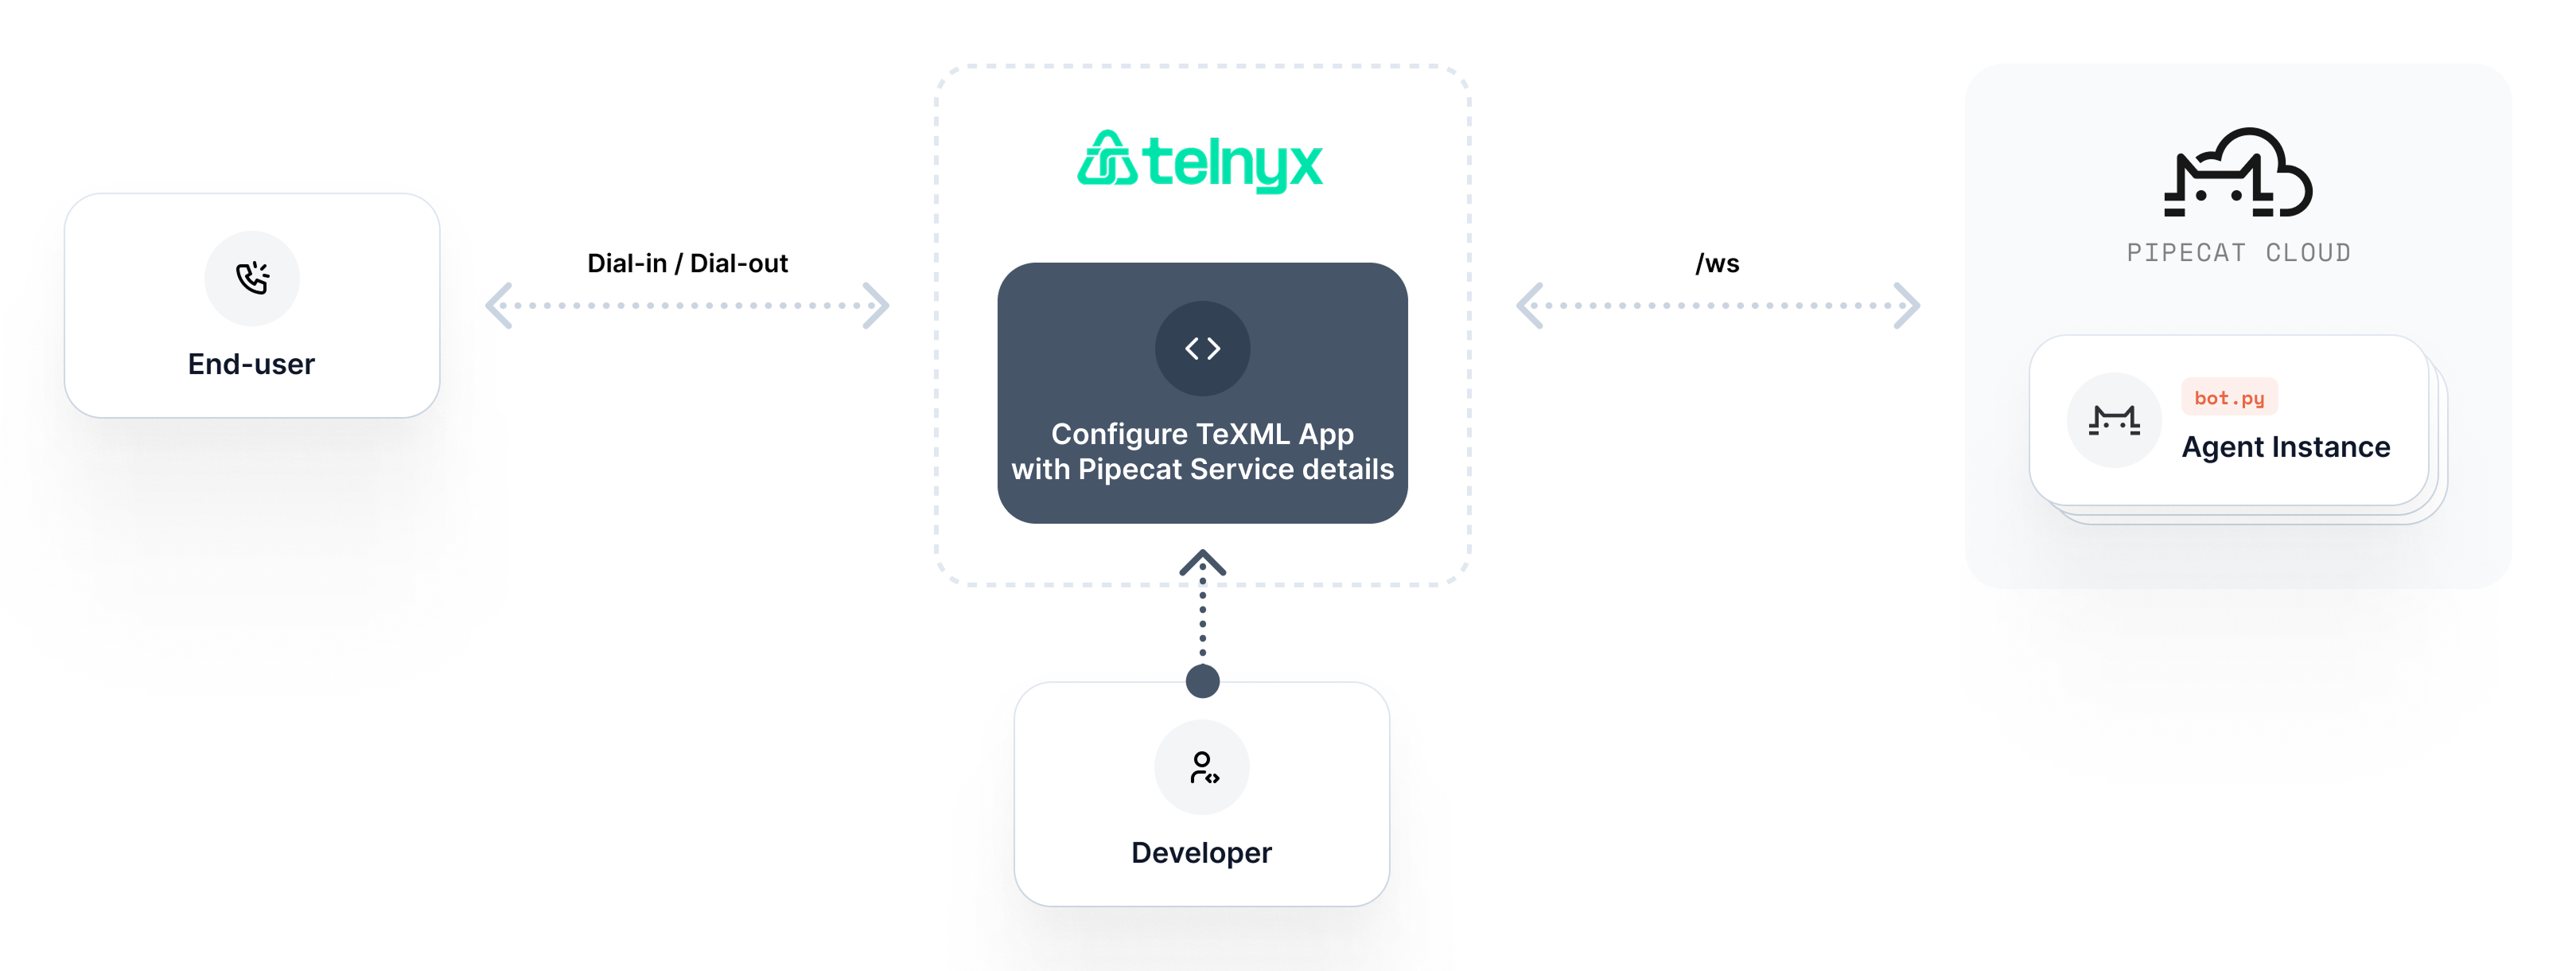
Pipecat Cloud implements Telnyx’s bidirectional Media Streaming protocol. While audio streams flow through WebSockets, the call session is controlled by updating the Telnyx Extensible Markup Language (TeXML) associated with each call’s unique identifier (call_control_id).
When Pipecat Cloud receives an incoming WebSocket connection from Telnyx, it processes the connected and start messages to initialize a new bot instance. All WebSocket messages are forwarded to your bot, including any custom parameters set in your TeXML. This allows your bot to leverage Telnyx’s Call Control API for advanced call control - such as recording conversations, transferring to human agents, or implementing complex call flows.
Prerequisites
Before setting up this integration, ensure you have:- A Telnyx account with voice capabilities
- A Pipecat Cloud account with a Telnyx WebSocket-compatible bot
Telnyx Setup
To connect your Pipecat Cloud bot to Telnyx’s voice network:- Purchase a phone number from Telnyx if you haven’t already. Ensure the number has voice capabilities.
-
Retrieve your Pipecat Cloud organization name using the
pipecatcloudCLI. This information is required when creating the TeXML configuration.
- Create a TeXML Application with the following configuration:
AGENT_NAMEwith your deployed bot’s name (e.g.,my-first-agent)ORGANIZATION_NAMEwith your organization name from step 2 (e.g.,three-random-words-randomnumber)
customer-support.industrious-purple-cat-12345
- Assign the TeXML Application to your Telnyx phone number:
- Navigate to Voice → Programmable Voice in your Telnyx dashboard
- In the TeXML Applications tab, select the pencil icon for the TeXML Application you created in step 3
- In the Numbers tab, select Assign numbers
- Select the number you would like to assign the TeXML Application to
- Click Save to apply your changes
Making and Receiving Calls
Receiving Inbound Calls
To test your integration, simply dial your Telnyx phone number from any phone. The call will connect to your Pipecat Cloud bot, which will respond according to your bot’s configuration.Making Outbound Calls
To initiate outbound calls, refer to the Telnyx WebSocket Integration guide for complete dial-out implementation details and examples.Custom Data Requirements
If you need to pass custom parameters to your bot beyond the standard call information (to/from numbers, call_control_id) that Telnyx automatically provides, you can pass custom data through query parameters in the WebSocket URL. For Pipecat Cloud deployment, custom data must be passed through the specialbody parameter, which should be base64-encoded to comply with telephony vendor requirements:
Example TeXML with custom data for Pipecat Cloud:
Unlike Twilio, Telnyx automatically provides caller information (to/from
numbers) in the WebSocket messages, so you only need a custom server if you
require additional contextual data beyond what Telnyx provides by default.
Advanced Call Control
Your bot can control the active call by leveraging Telnyx’s Call Control API with thecall_control_id that’s automatically provided to your bot. This enables capabilities such as:
- Recording conversations
- Playing audio prompts
- Gathering DTMF input (keypad presses)
- Ending calls programmatically